How to setup an Apple computer
If you just got a new Apple computer, follow the steps below to set it up.
Step 1: When you turn on your computer, you will see a black screen with the Apple logo.

Step 2: The screen will then change and you will see the word “hello” across it. Click on Get Started at the bottom of the screen.

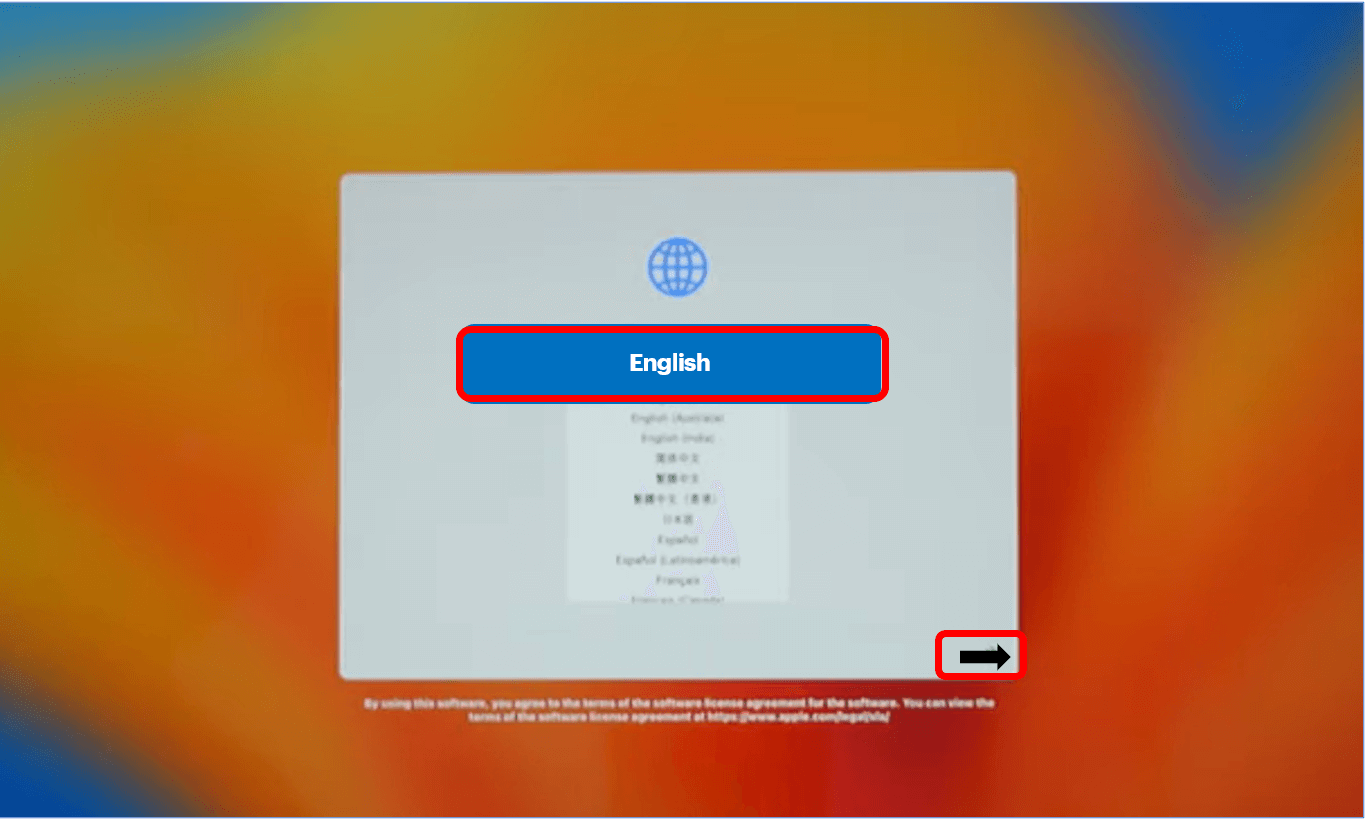
Step 3: You will get a screen to select your Language so you will select the Language and click on the arrow button.
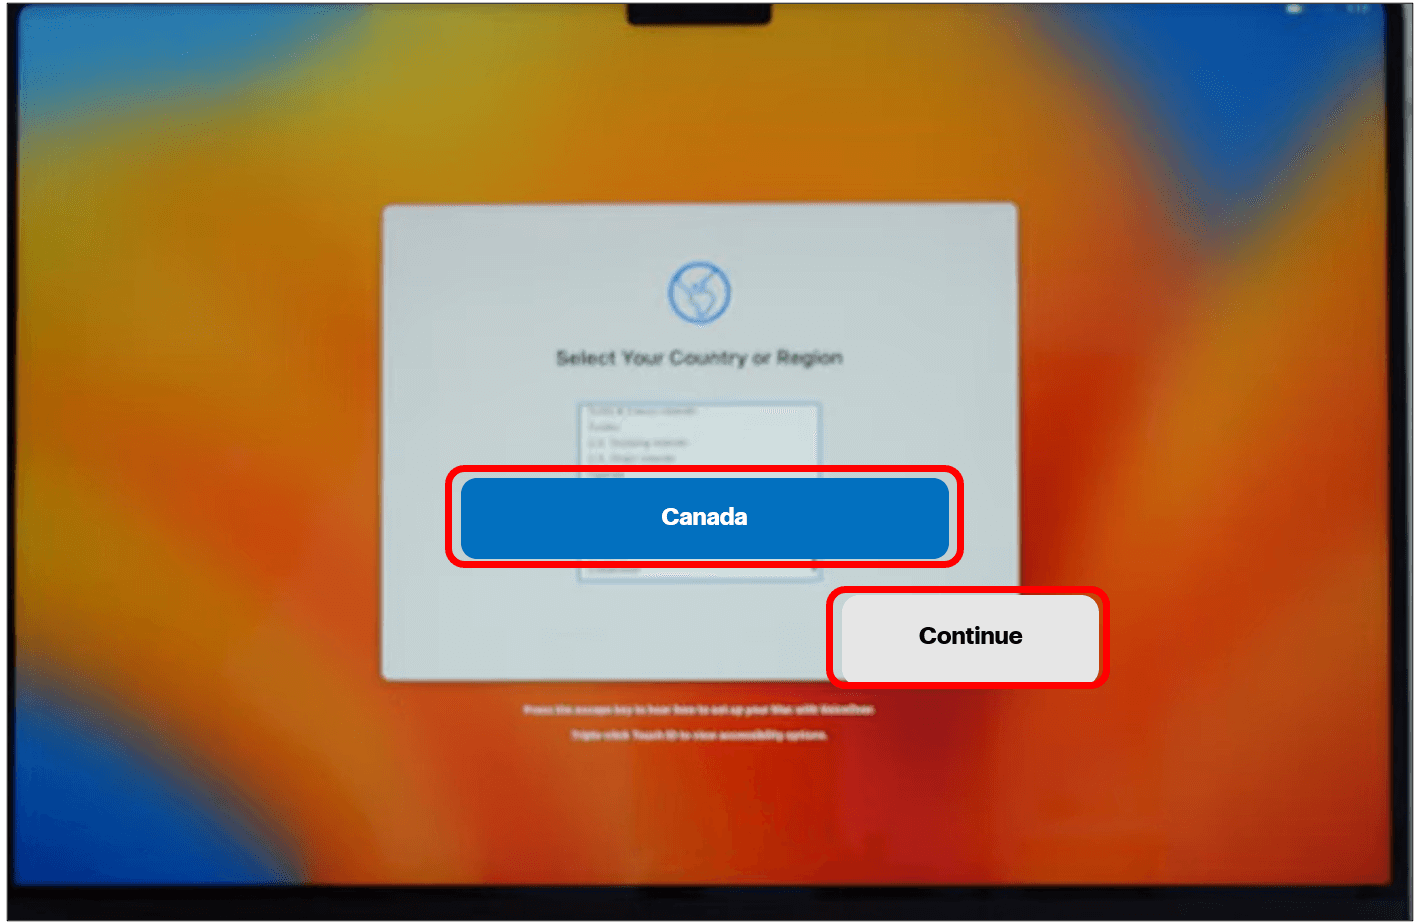
Step 4: Next you will be asked to choose your Country and then click on Continue.
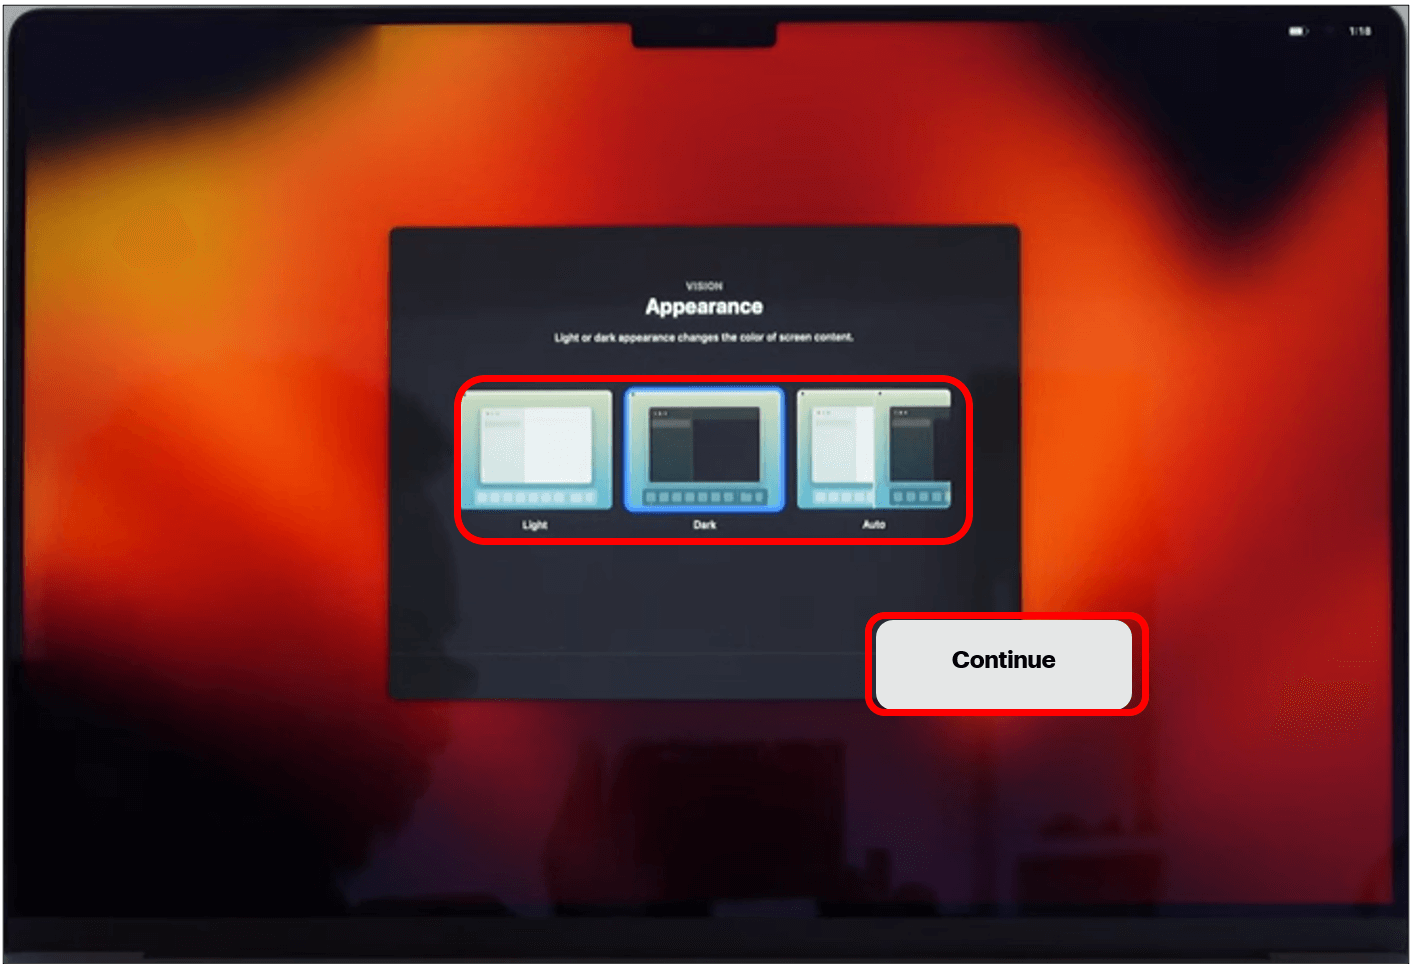
Step 5: The next step is to choose which screen appearance you are comfortable with. You have the option between Light, Dark or Auto. Light appearance uses a light background with dark text and dark appearance uses a dark background with light text. Dark mode is easier on the eyes as not as much light is coming from the screen. Choose which one you would like by clicking on it, then click on on Continue in the bottom right corner.
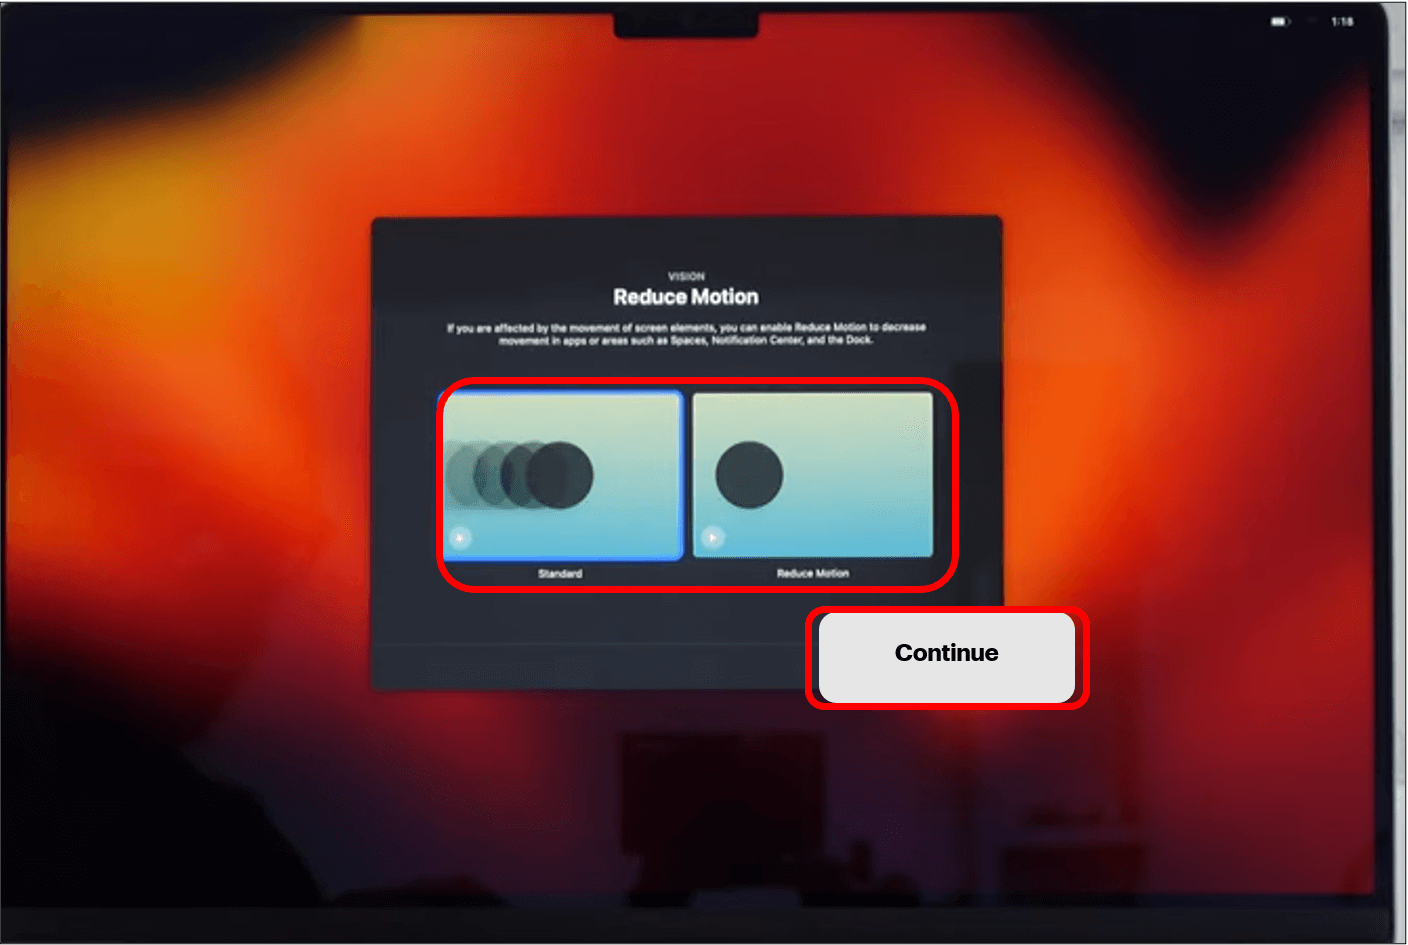
Step 6: Choose which motion settings you would like to have on your computer. You have two options: standard or reduce motion. This is a setting that can help with anyone who suffers from motion sickness or virtigo. Click on the option you choose then click on continue in the bottom right corner.
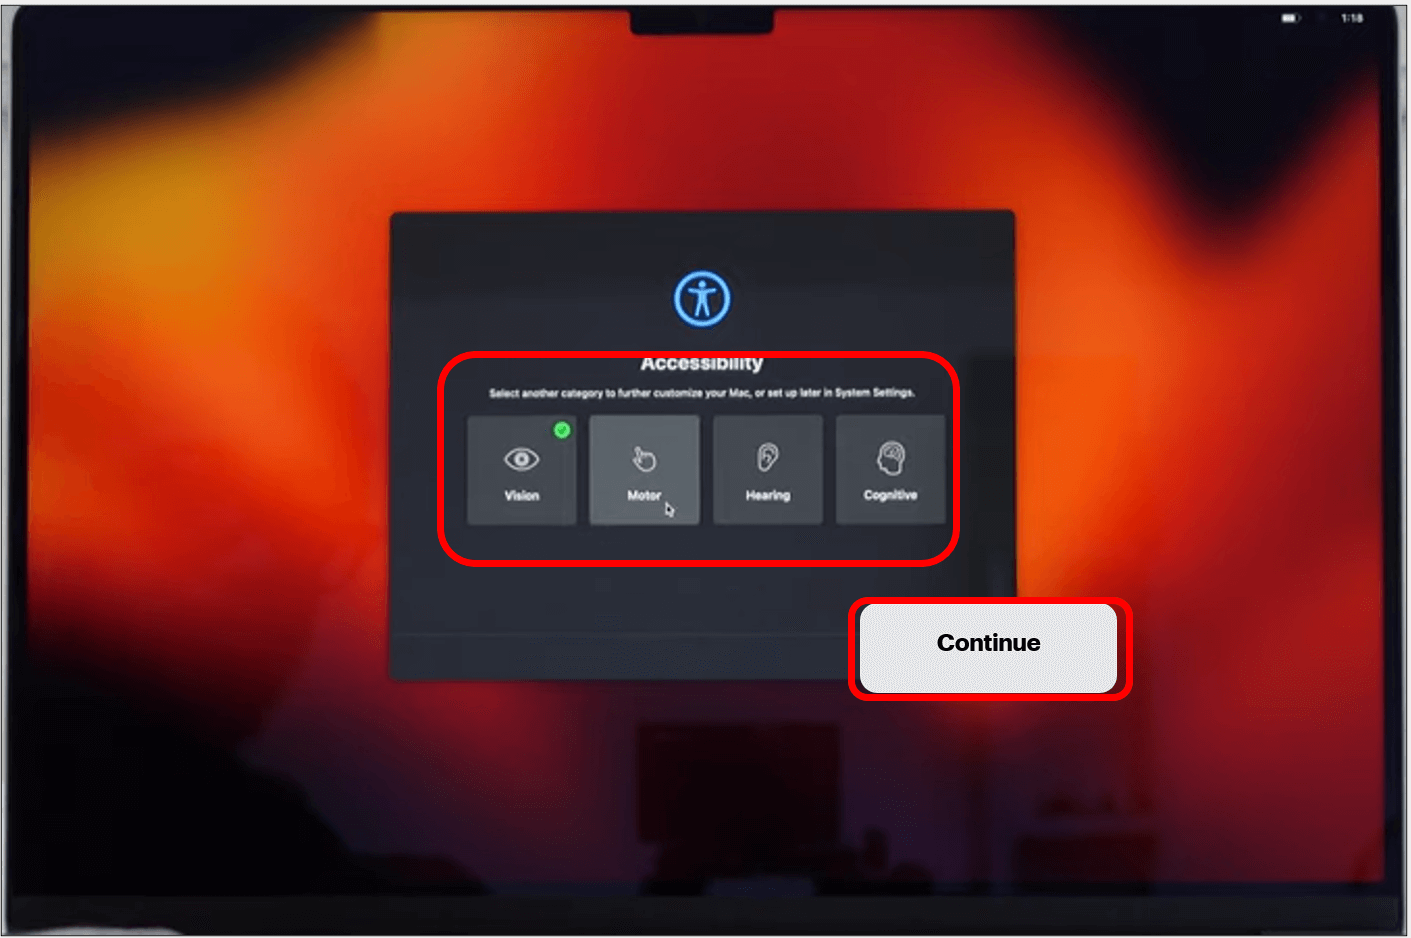
Step 7: You can now explore the different accessibility settings and set up the computer to your comfort. You will have the options of: Motor, Vision, Hearing, and Cognitive. Click on each to to see more options. Once you are ready to move on to the next screen, click on Continue.
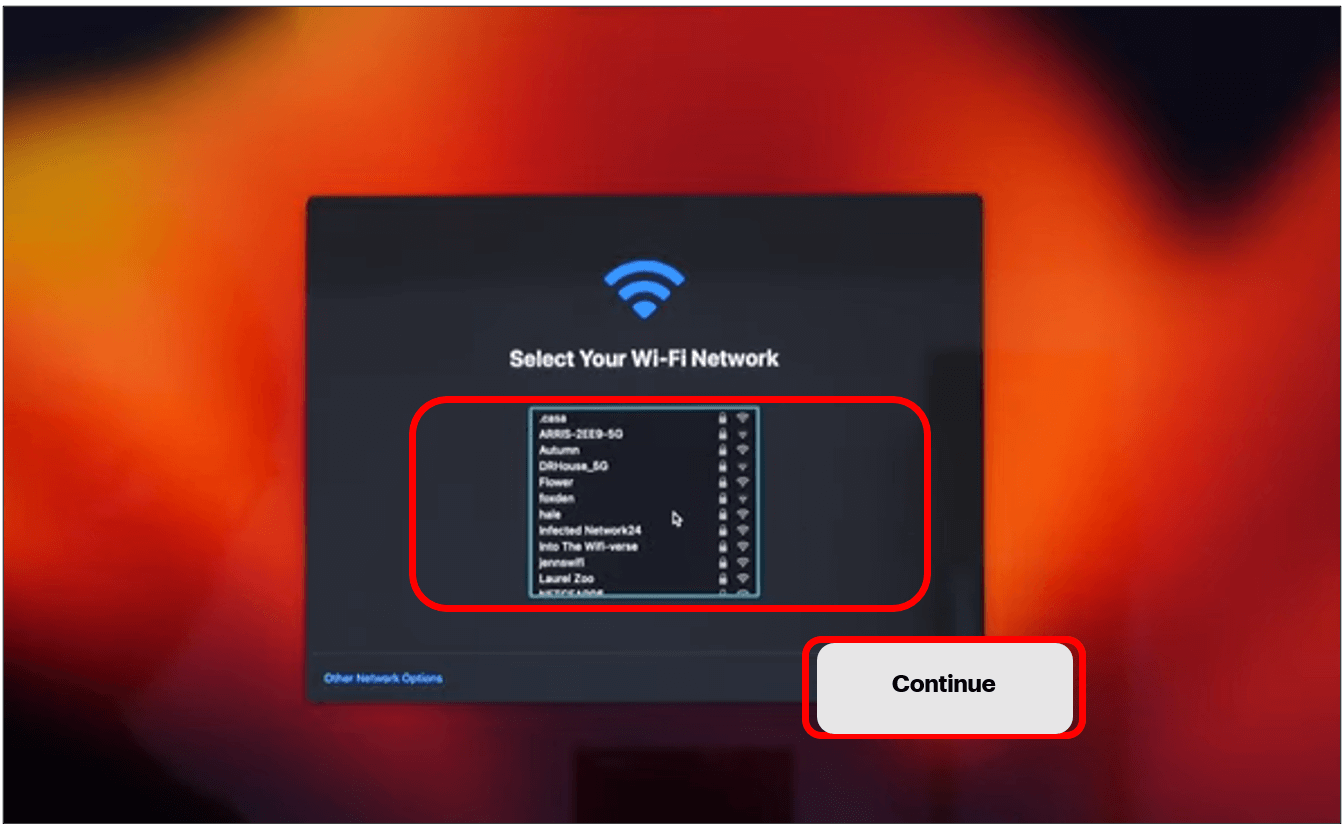
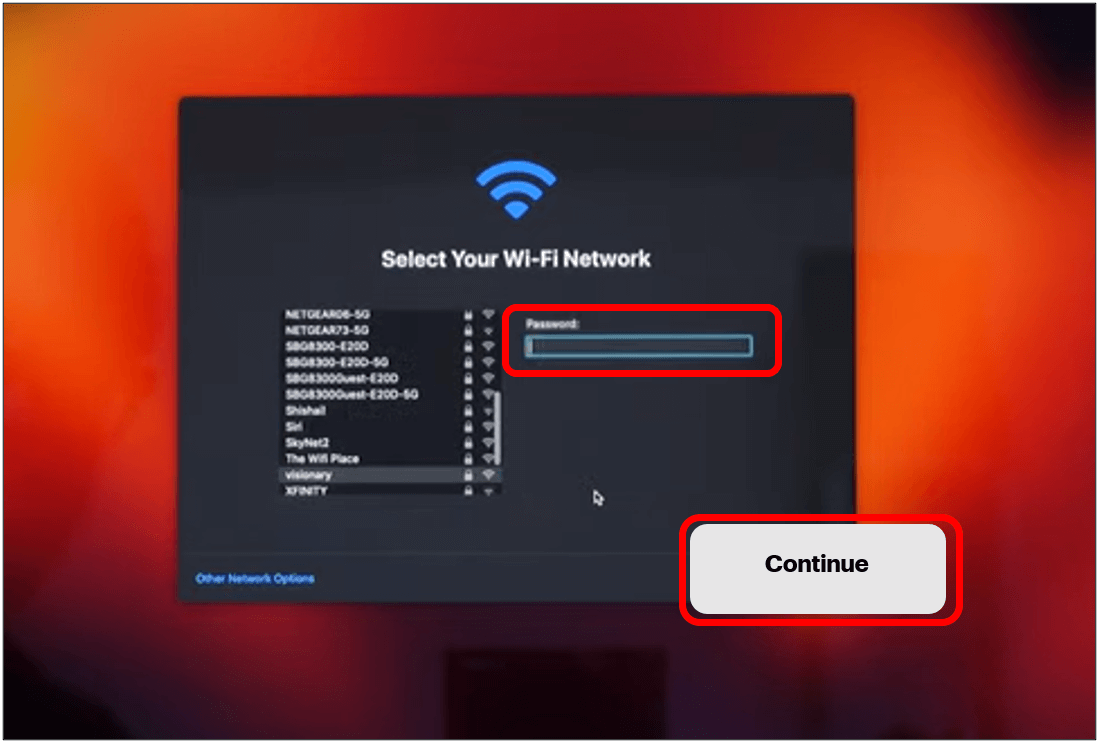
Step 8: A list of different Wi-Fi networks available near you will appear on the screen. Find your wifi network name and click on it. You will then input the password for that network. Click on Continue.
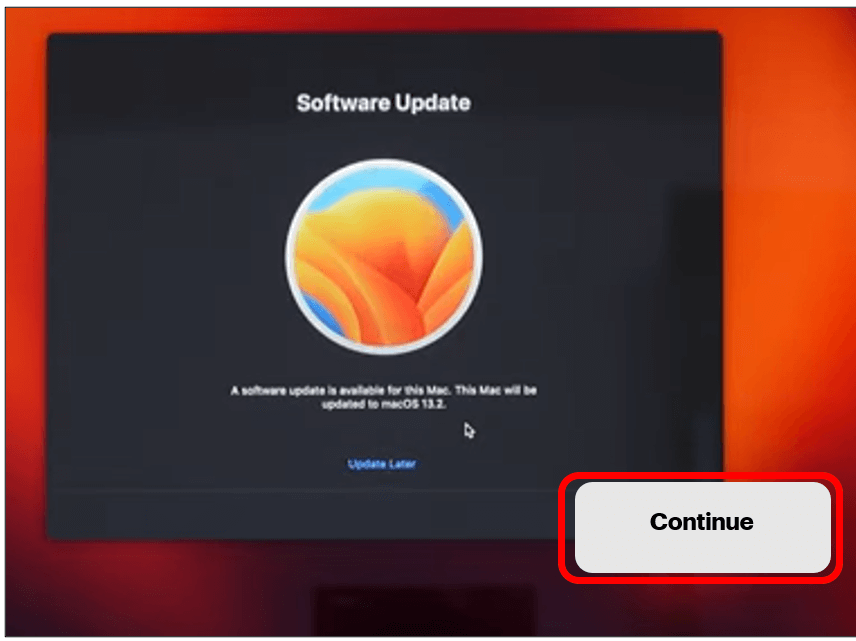
Step 9: The next window that you might see is the software update if the Mac detects that there is an update for the operating system. You can either click on Update Later or Continue.
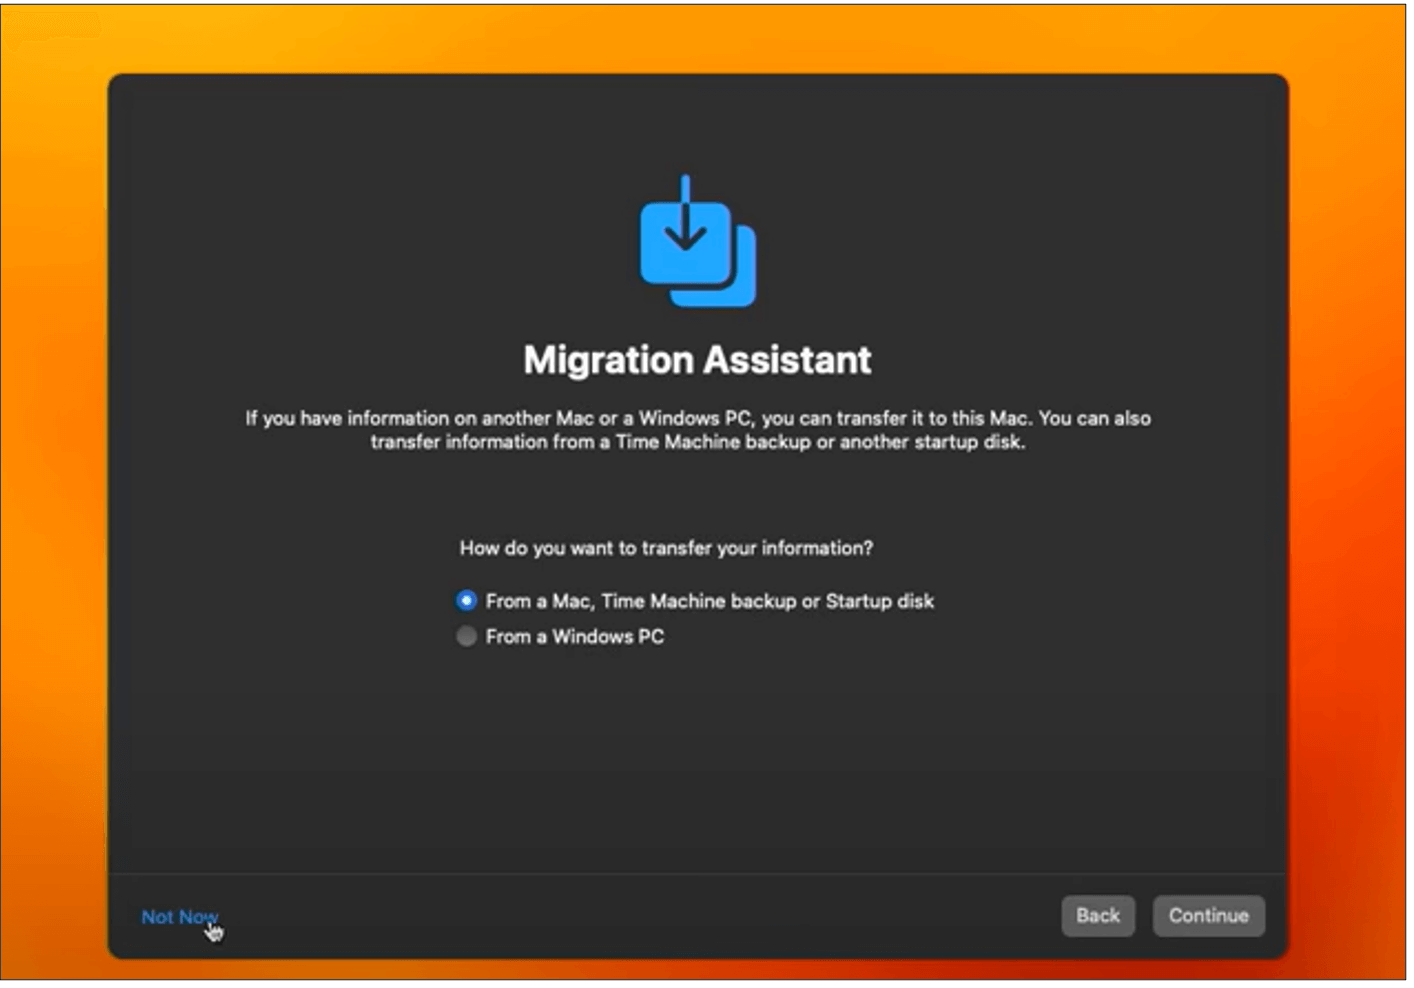
Step 10: You will get a screen with the option for Migration Assistant. This would allow you to transfer the data from one Mac to another Mac, or Windows PC. If you have content that you wish to migrate, you will want to select the option and then click on continue but if you do not have anything then you can click on “Not now”.
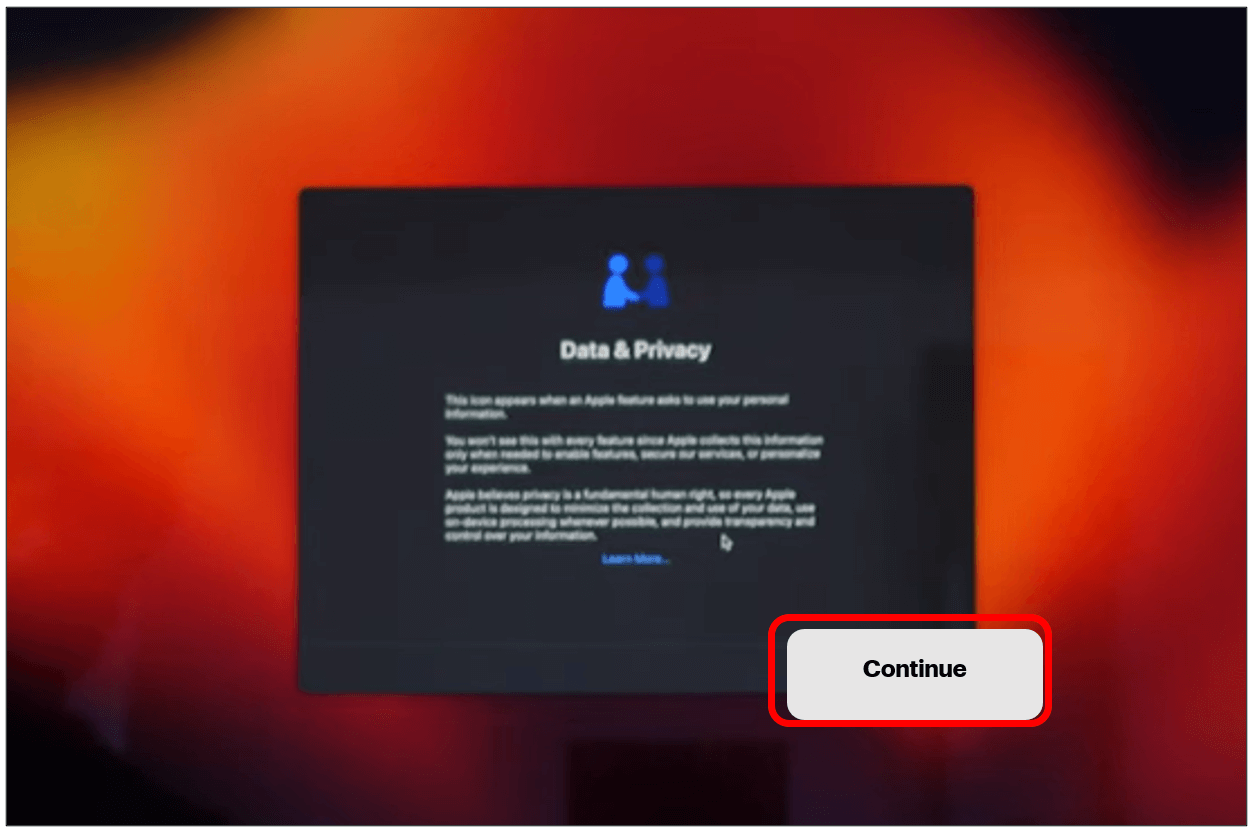
Step 11: You will then see the Data and Privacy policy goes over the privacy of your data so you can either click on Learn More or Continue.
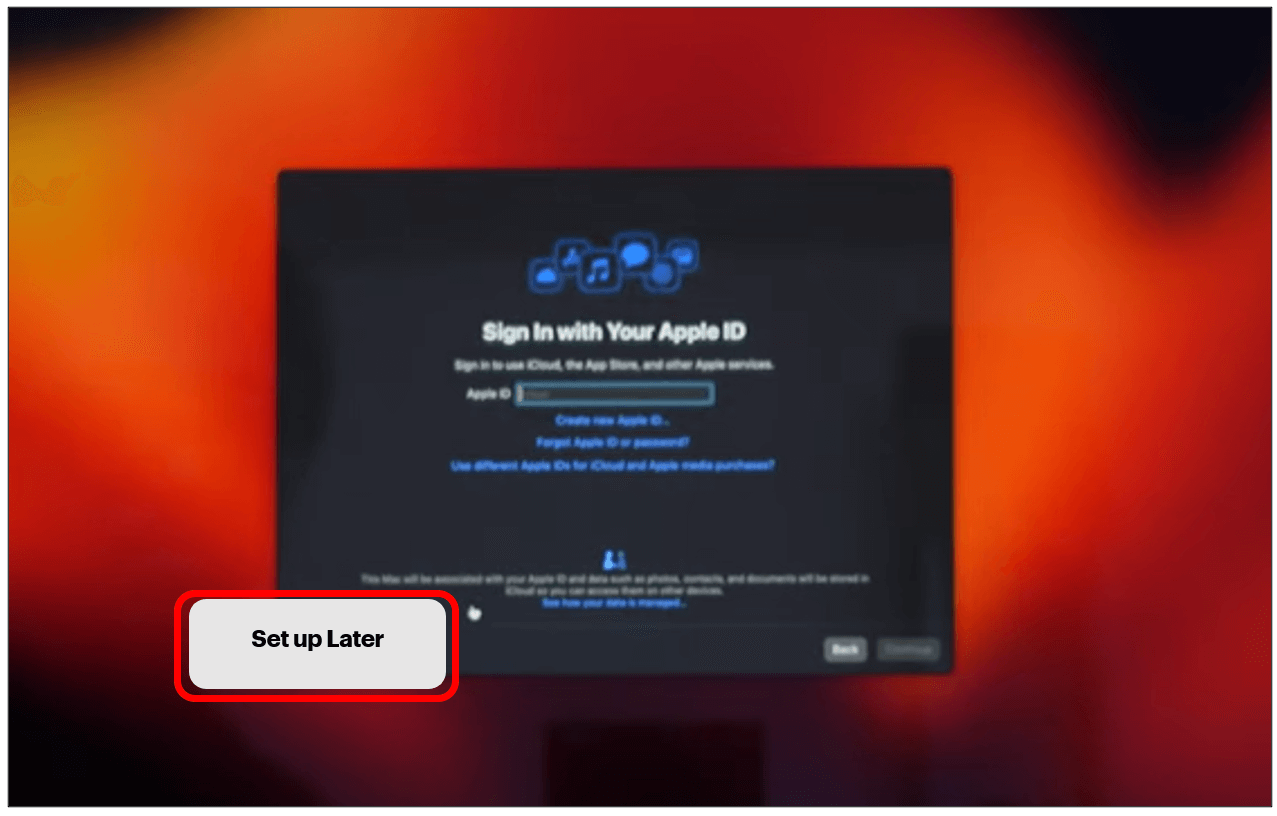
Step 12: Next you can set up or sign into your Apple ID. If you have an iPhone or an iPad already, you could possibly have an Apple ID account and password so you can sign into the Mac with that account. If you do not have an Apple ID already, you can select Create new Apple ID to get it set up or you can just click on Set up later. If you put in the apple ID, you would click on Continue. For this demo we will set up later.
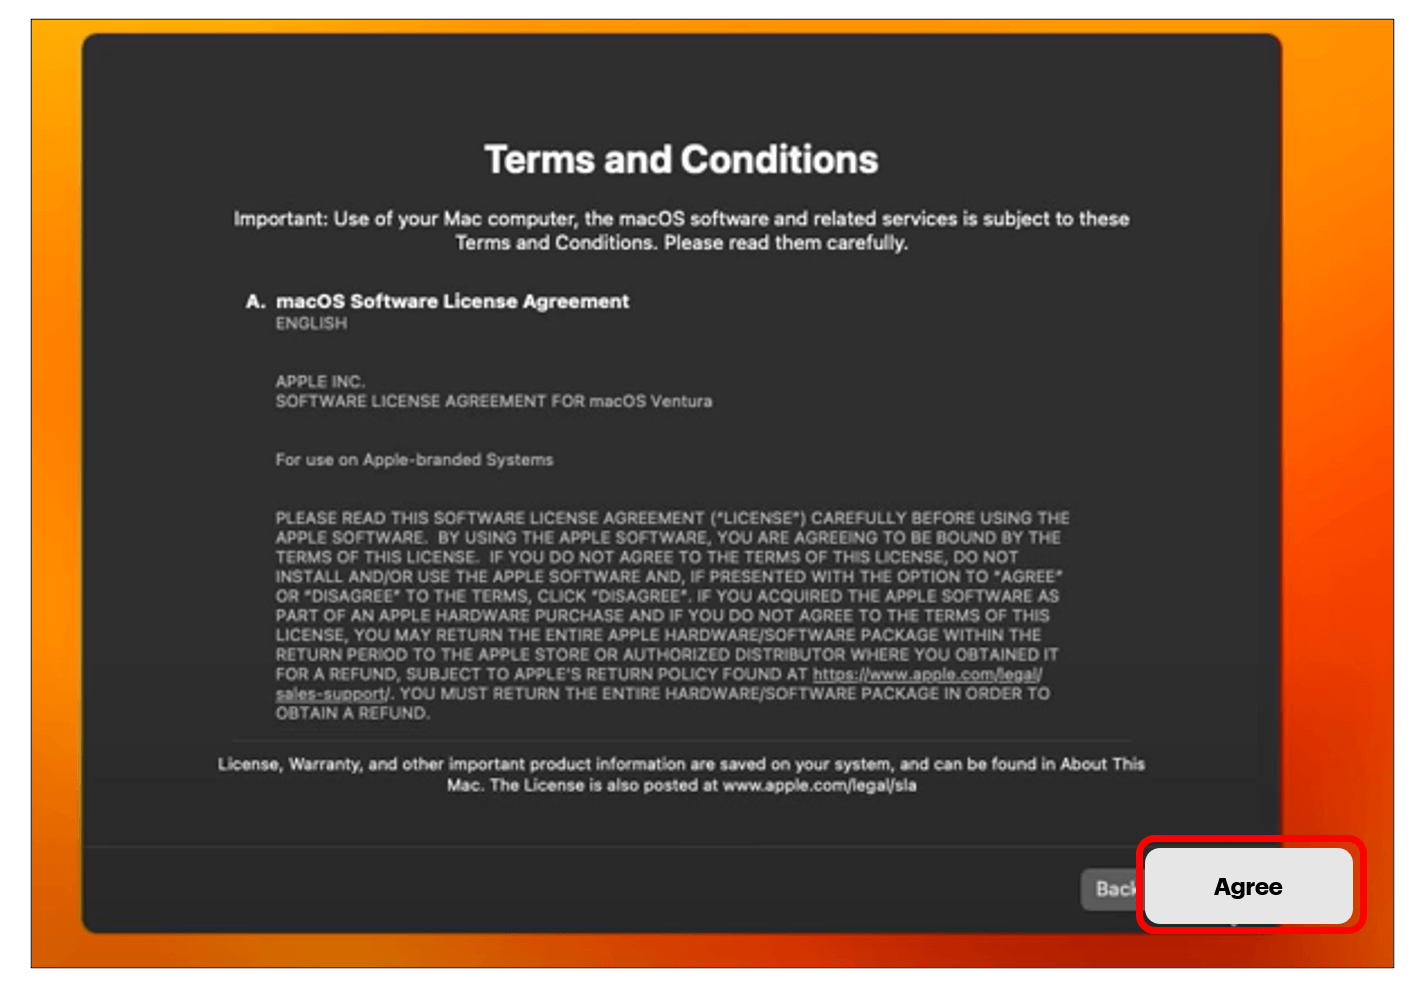
Step 13: The next window would be the terms and conditions which you want to click on Agree once you have read through them.
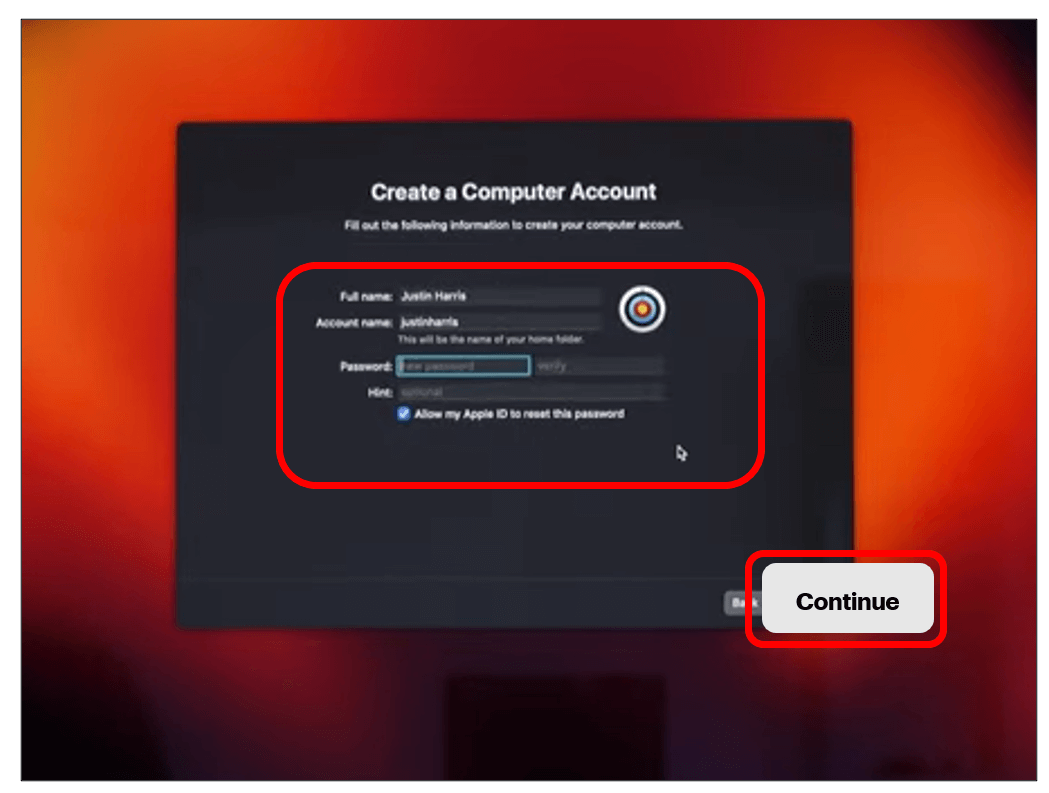
Step 14: You will then be asked to “Create a Computer Account”. You can put in your name, account name, password, password hint. This is to make sure that only you can get into your computer. Once that is done, you will click on the Continue button.
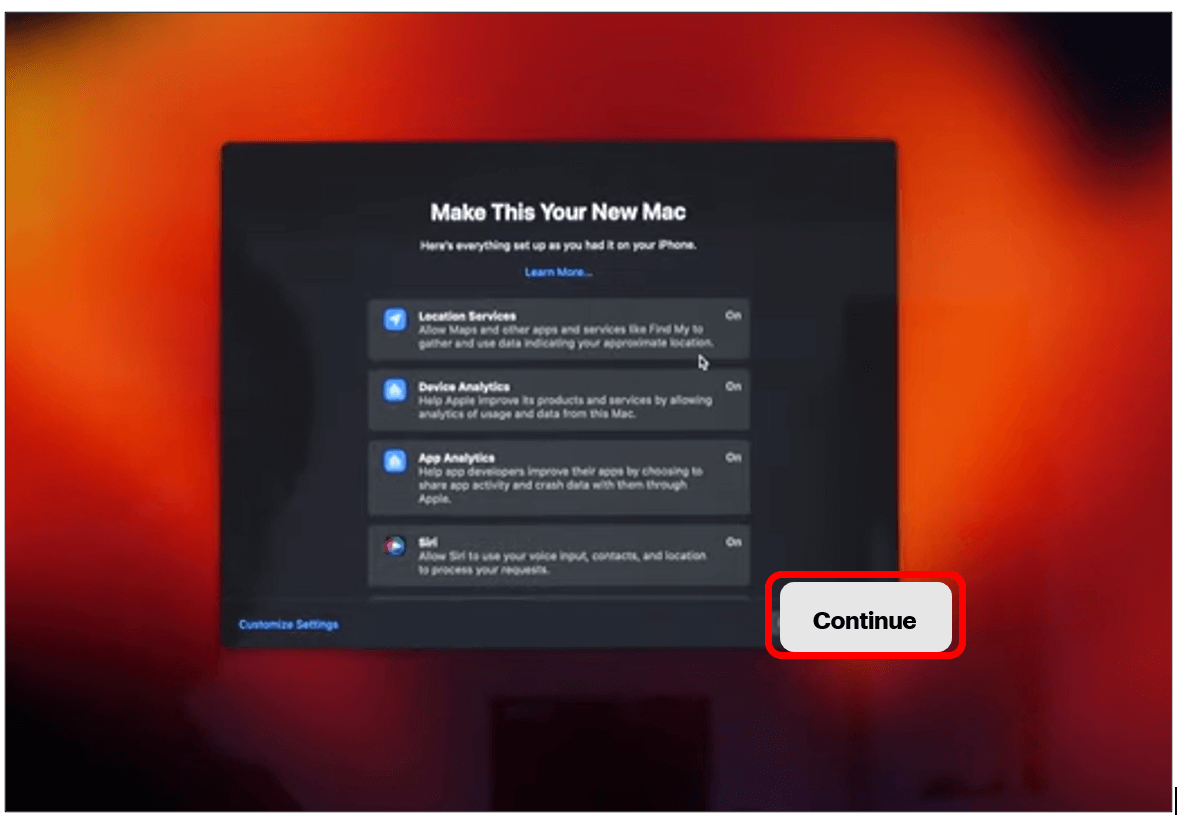
Step 15: The next screen will show you a menu with “Make this your new mac”. This lists the different services that you can turn on or off depending on your personal preferences by clicking on each of the options. If you have an iPhone or iPad, it will default to the same settings that you have on that device. Once you are comfortable with the settings, click on Continue.
Step 16: If you want to secure the disk and the data, you can check mark the “Turn on FileVault disk encryption”. You can also checkmark the “Allow my iCloud account to unlock my disk” or you can not checkmark it. FileVault disk encryption means that if someone were to try to take the stuff on your computer, all they will see are a bunch of letters and numbers, but not your actual stuff. Click on Continue.

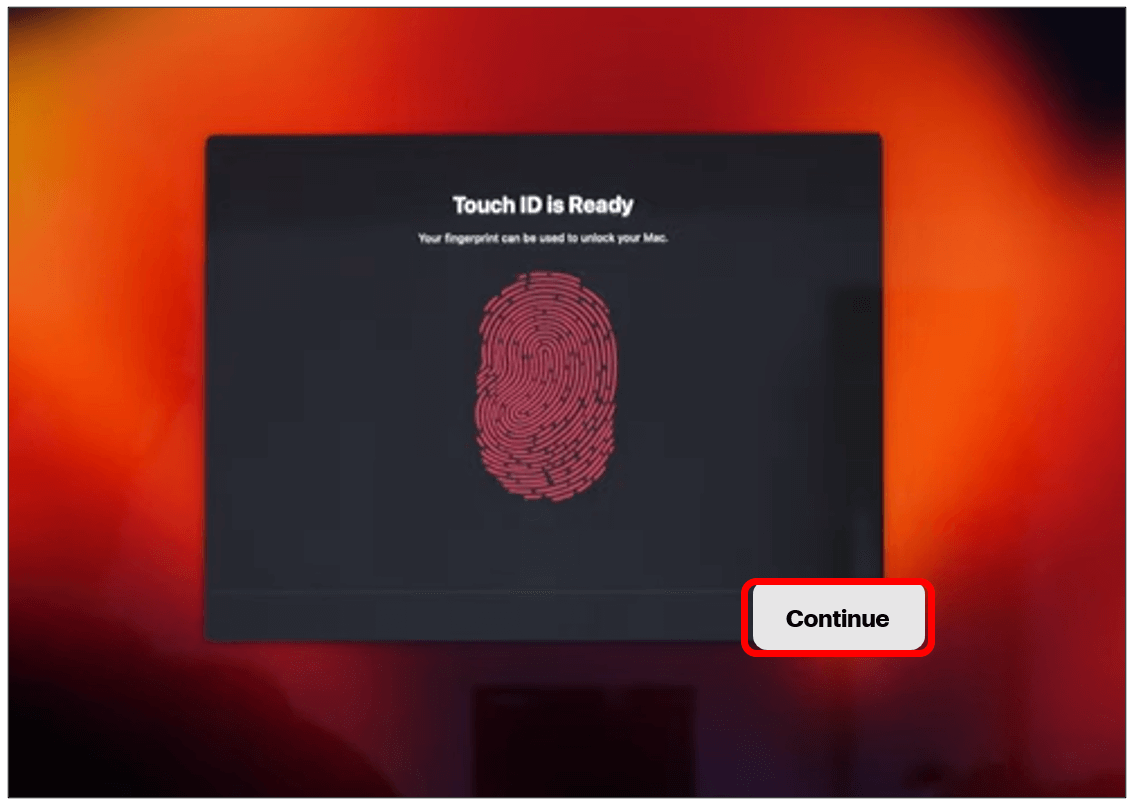
Step 17: The next screen is for setting up Touch id. You can either click on Continue or Set up Later.
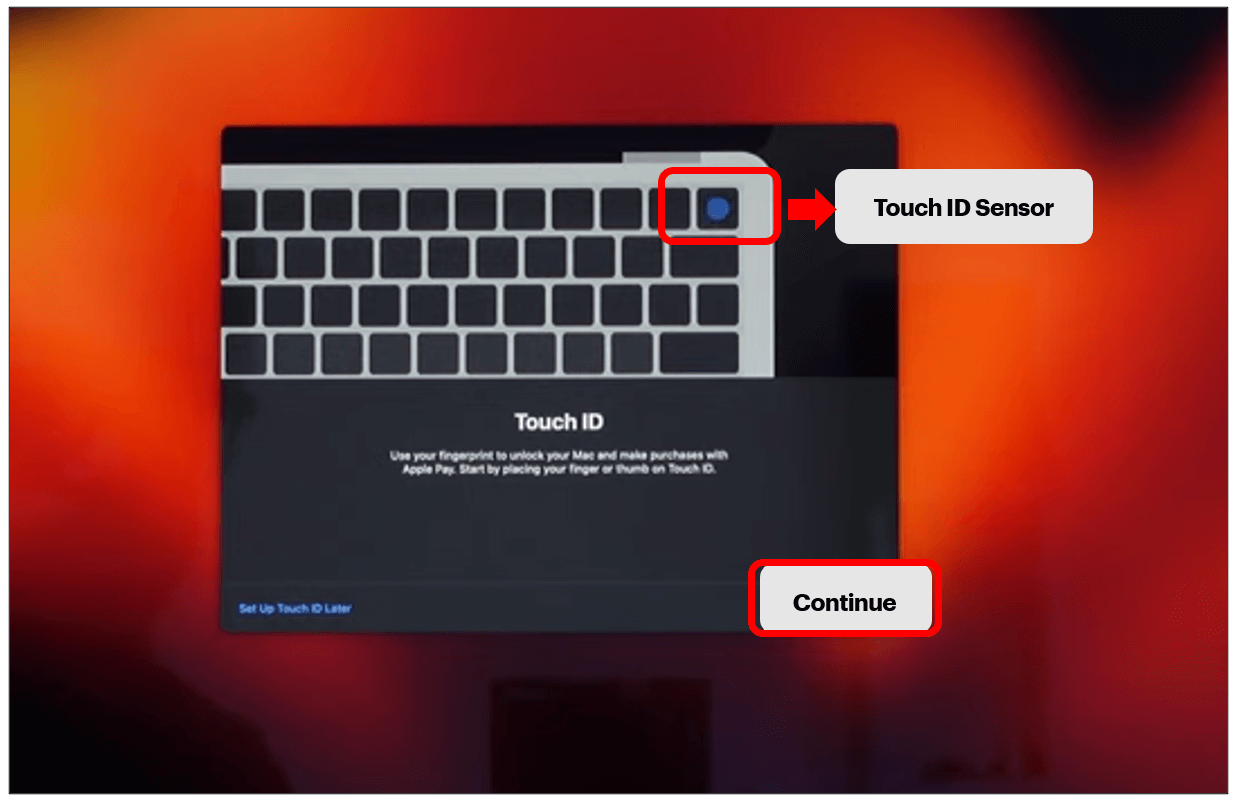
To set up Touch ID now: Once you click on Continue, you will get a screen that asks to place your finger so you want to lift and rest your finger on the touch id sensor repeatedly and when it detects it, click on Continue.
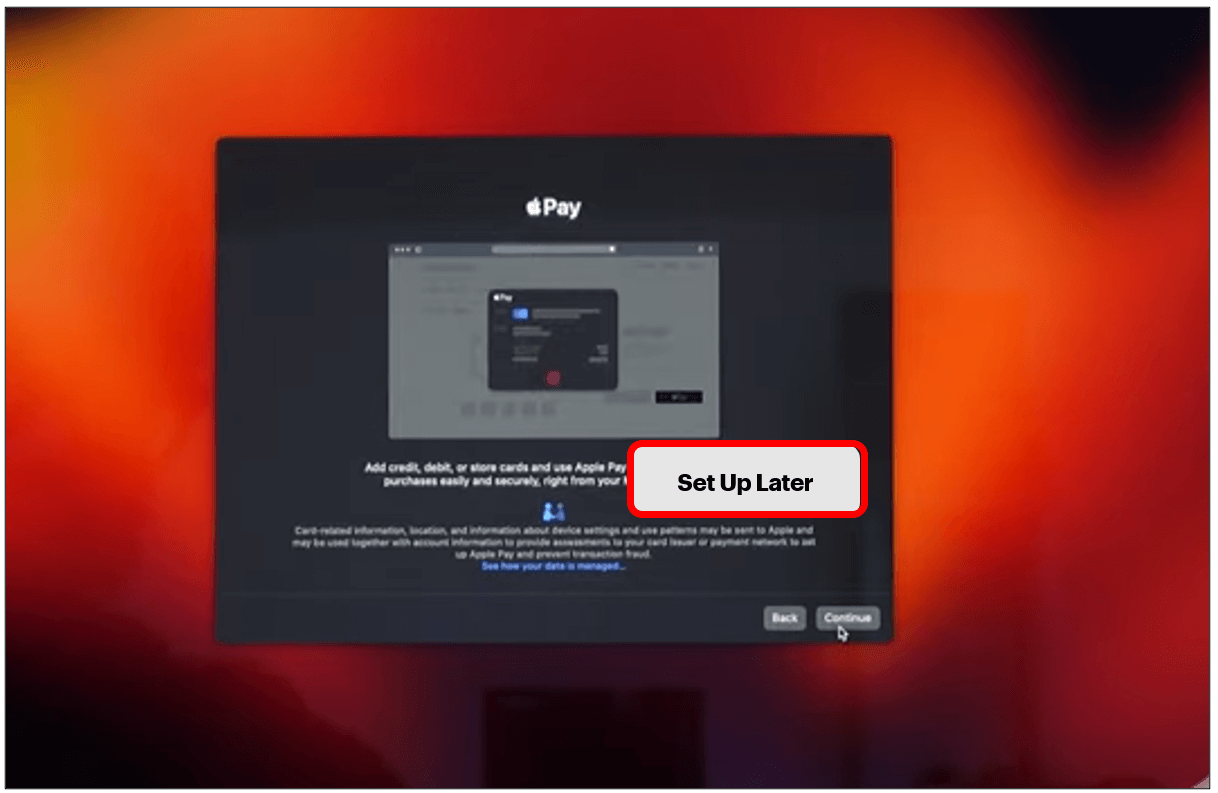
Step 18: The next screen is to set up “Apple Pay” which you can either click on Set Up Later or to click on Continue. Apple Pay is a safe digital wallet that allows you to add your credit card and debit card so that you can use your device to pay for things. For this demo we will click on Set up later.
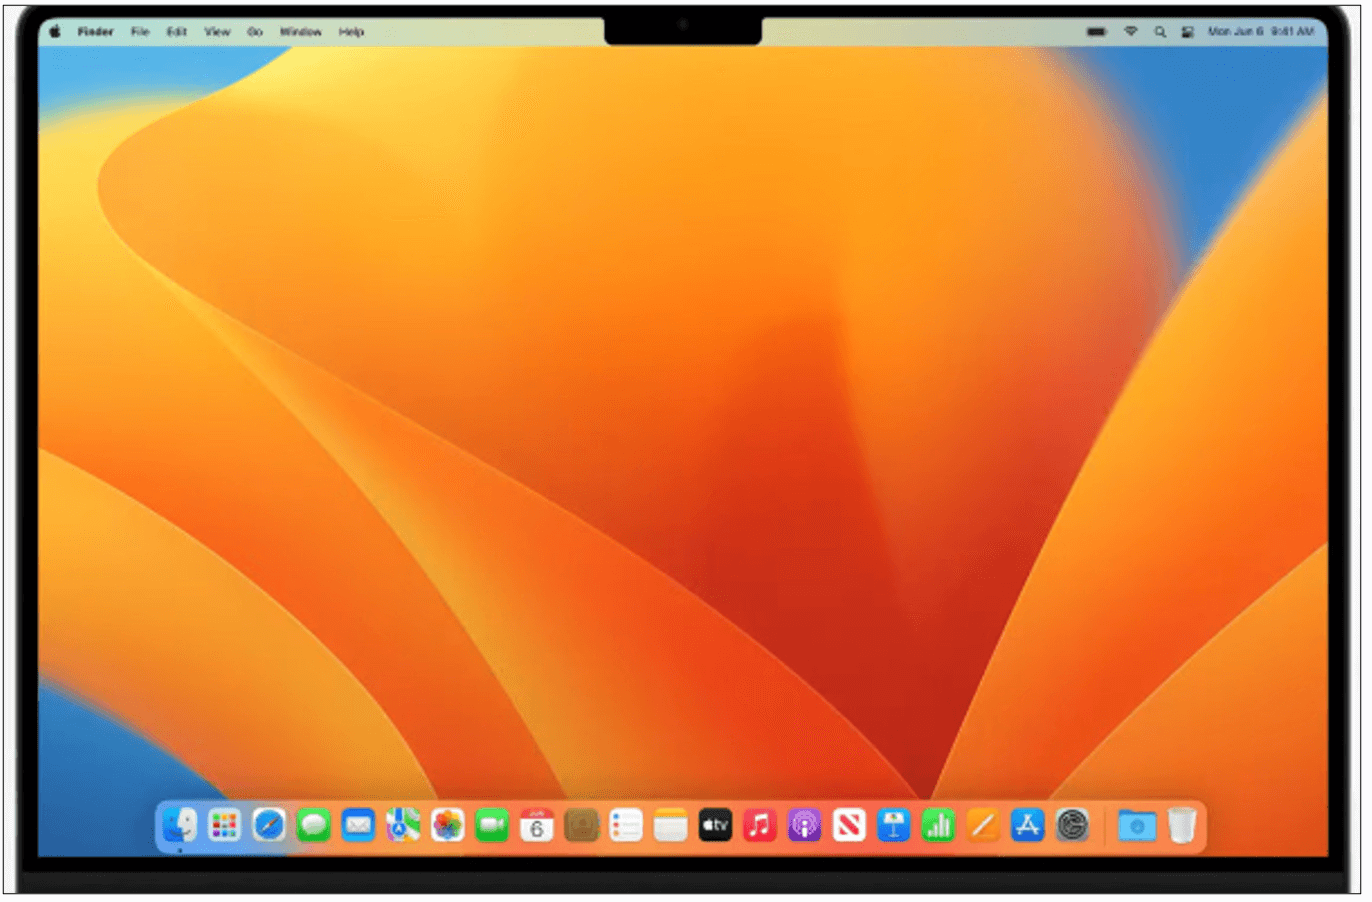
Step 19: The computer will then load to the desktop and it is ready to use!