Add an Email account to iPad
Now that we understand what email is and how to access the Mail app, let’s go through the steps of adding an email account to an iPad.
There are many different email providers, however it does not matter which one you have an account with. Examples of email service providers include: Google, Apple, Rogers, Microsoft, Yahoo, and Shaw
Any of these service providers allow users to create emails and add them to the Mail app!
Below are the steps to add an account to the Mail app. Follow these steps to start sending and receiving emails right from your iPad!
How to add an account to the mail app
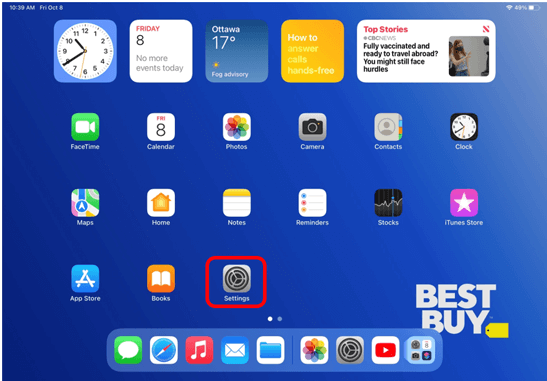
Step 1: Locate and tap on the Settings app icon on the home screen of your iPad.
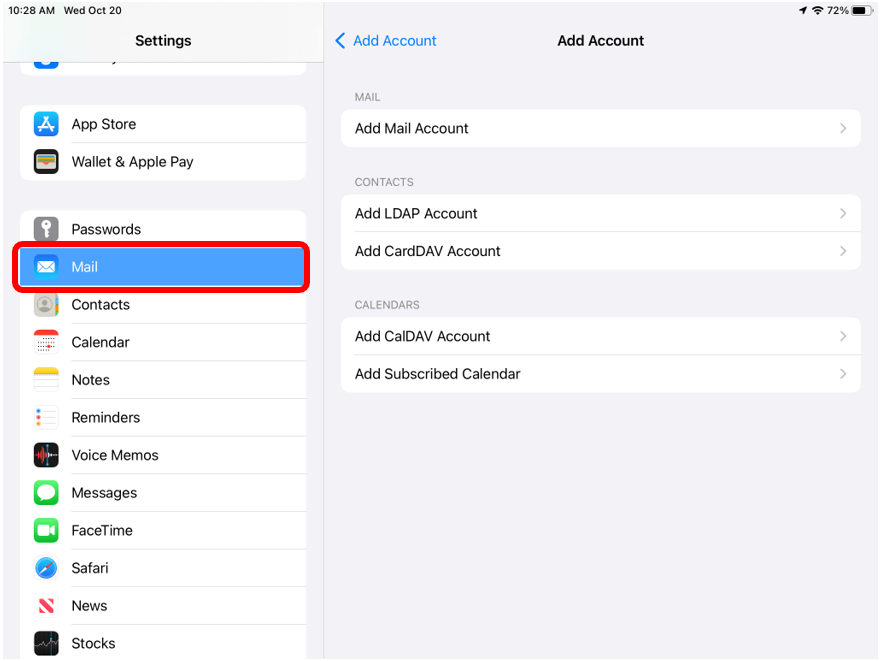
Step 2: Scroll through the menu on the left-hand side to find the tab titled Mail and tap on it.
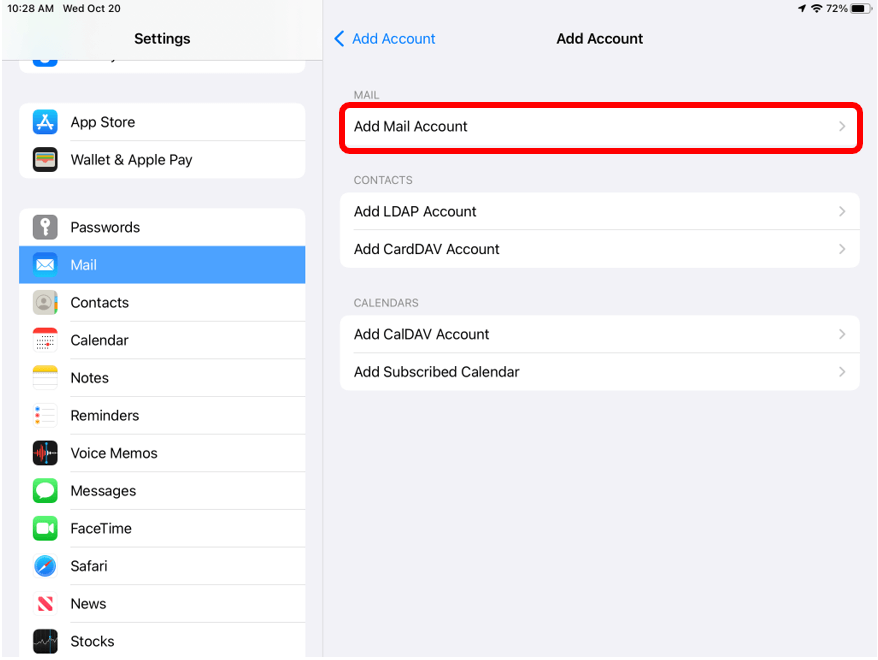
Step 3: On the menu on the right-side of the screen, tap on the option titled Add Mail Account.
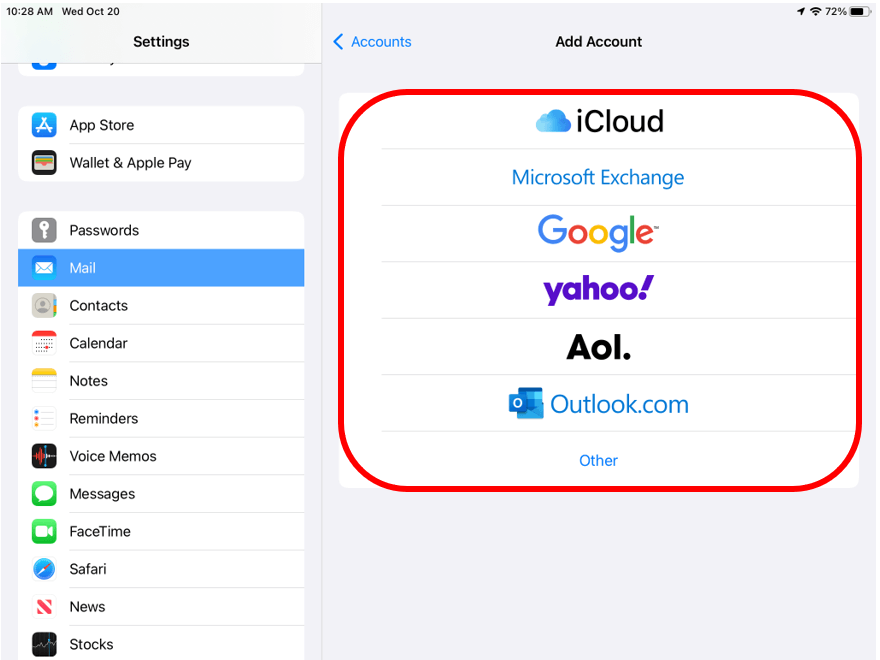
Step 4: Tap on the email service provider that your email address is connected to. Once you tap on the provider, you will be asked to input your email address and then your password. Once you have inputted this information your account will be added to the Mail app!
Helpful Hint
- The Mail app allows users to add multiple accounts to the app. This means if you have more than one email account, you can add it to the Mail app. Once you add one account, follow the same steps to add another!