Connect to Wi-Fi on your iPhone
To browse the internet, send messages, or download apps you must be connected to a Wi-Fi network. In order to join a Wi- Fi network, you must have the network name and password. If you travel to a different location, such as a family member’s home you can join their network by asking for the name of the Wi- Fi network and the password. If you are not connected to a network, your phone will start to use your data. With phone plans you typically only get a certain amount of data. This is why it is important to connect to Wi-Fi when possible. Below are the steps to connect to a Wi-Fi network through the Settings app.
How to Connect to Wi-Fi
Scroll down and click on the play button on the video to start it. The play button looks something like this.
Remember: you can rewind and pause the video if you need to.
Step 1: Locate and tap on the Settings app icon on your home screen or App Library.

Step 2: From the Settings menu, tap on the option titled Wi-Fi.

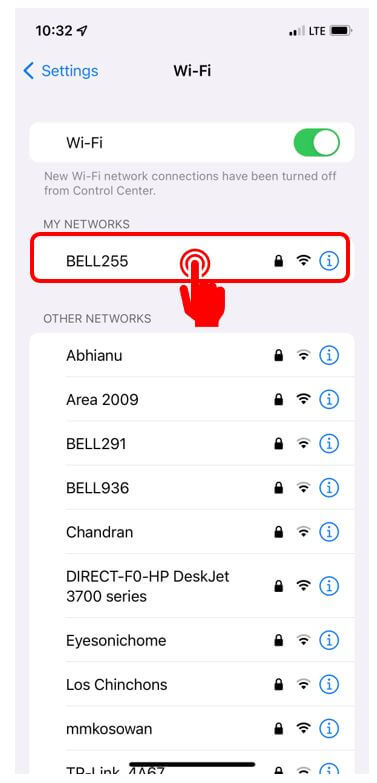
Step 3: Find and tap on the name of the Wi-Fi network you would like to connect to from the list. Note: the networks available to you will be different from the ones shown in the photo below.
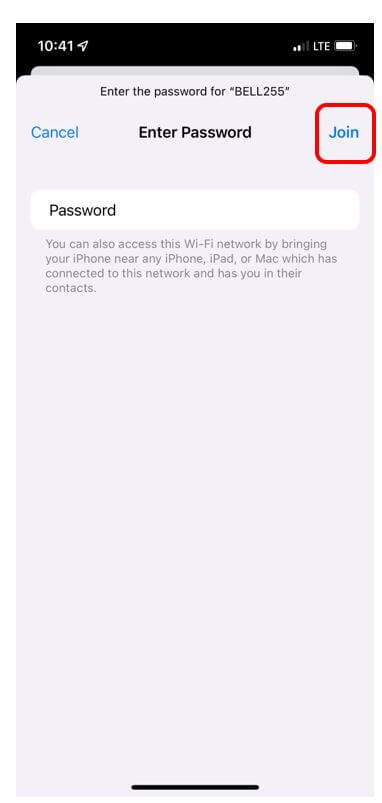
Step 4: Once you tap on the network, if there is a password required to connect you will have to enter the password. When you are done typing in the password, tap on Join in the top right corner. Once you successfully join a network you will see a blue check mark beside the network name.
Helpful Hints
- If you join a network once, the device will automatically join when you enter that location.
- Wi-Fi networks are unique. The ones you see in your home will be different from the ones you see in the mall or your family’s home.